Contact stages in ATZ CRM help you organize and track your interactions with contacts effectively. This guide will show you how to update and customize contact stages in ATZ CRM.
Changing Contact Stages
Method 1: Bulk Update Contact Stages:
Step 1 : Go to the list of contacts in your ATZ CRM dashboard.
Step 2: Select the contacts you want to update.
Step 3: Click on update on top
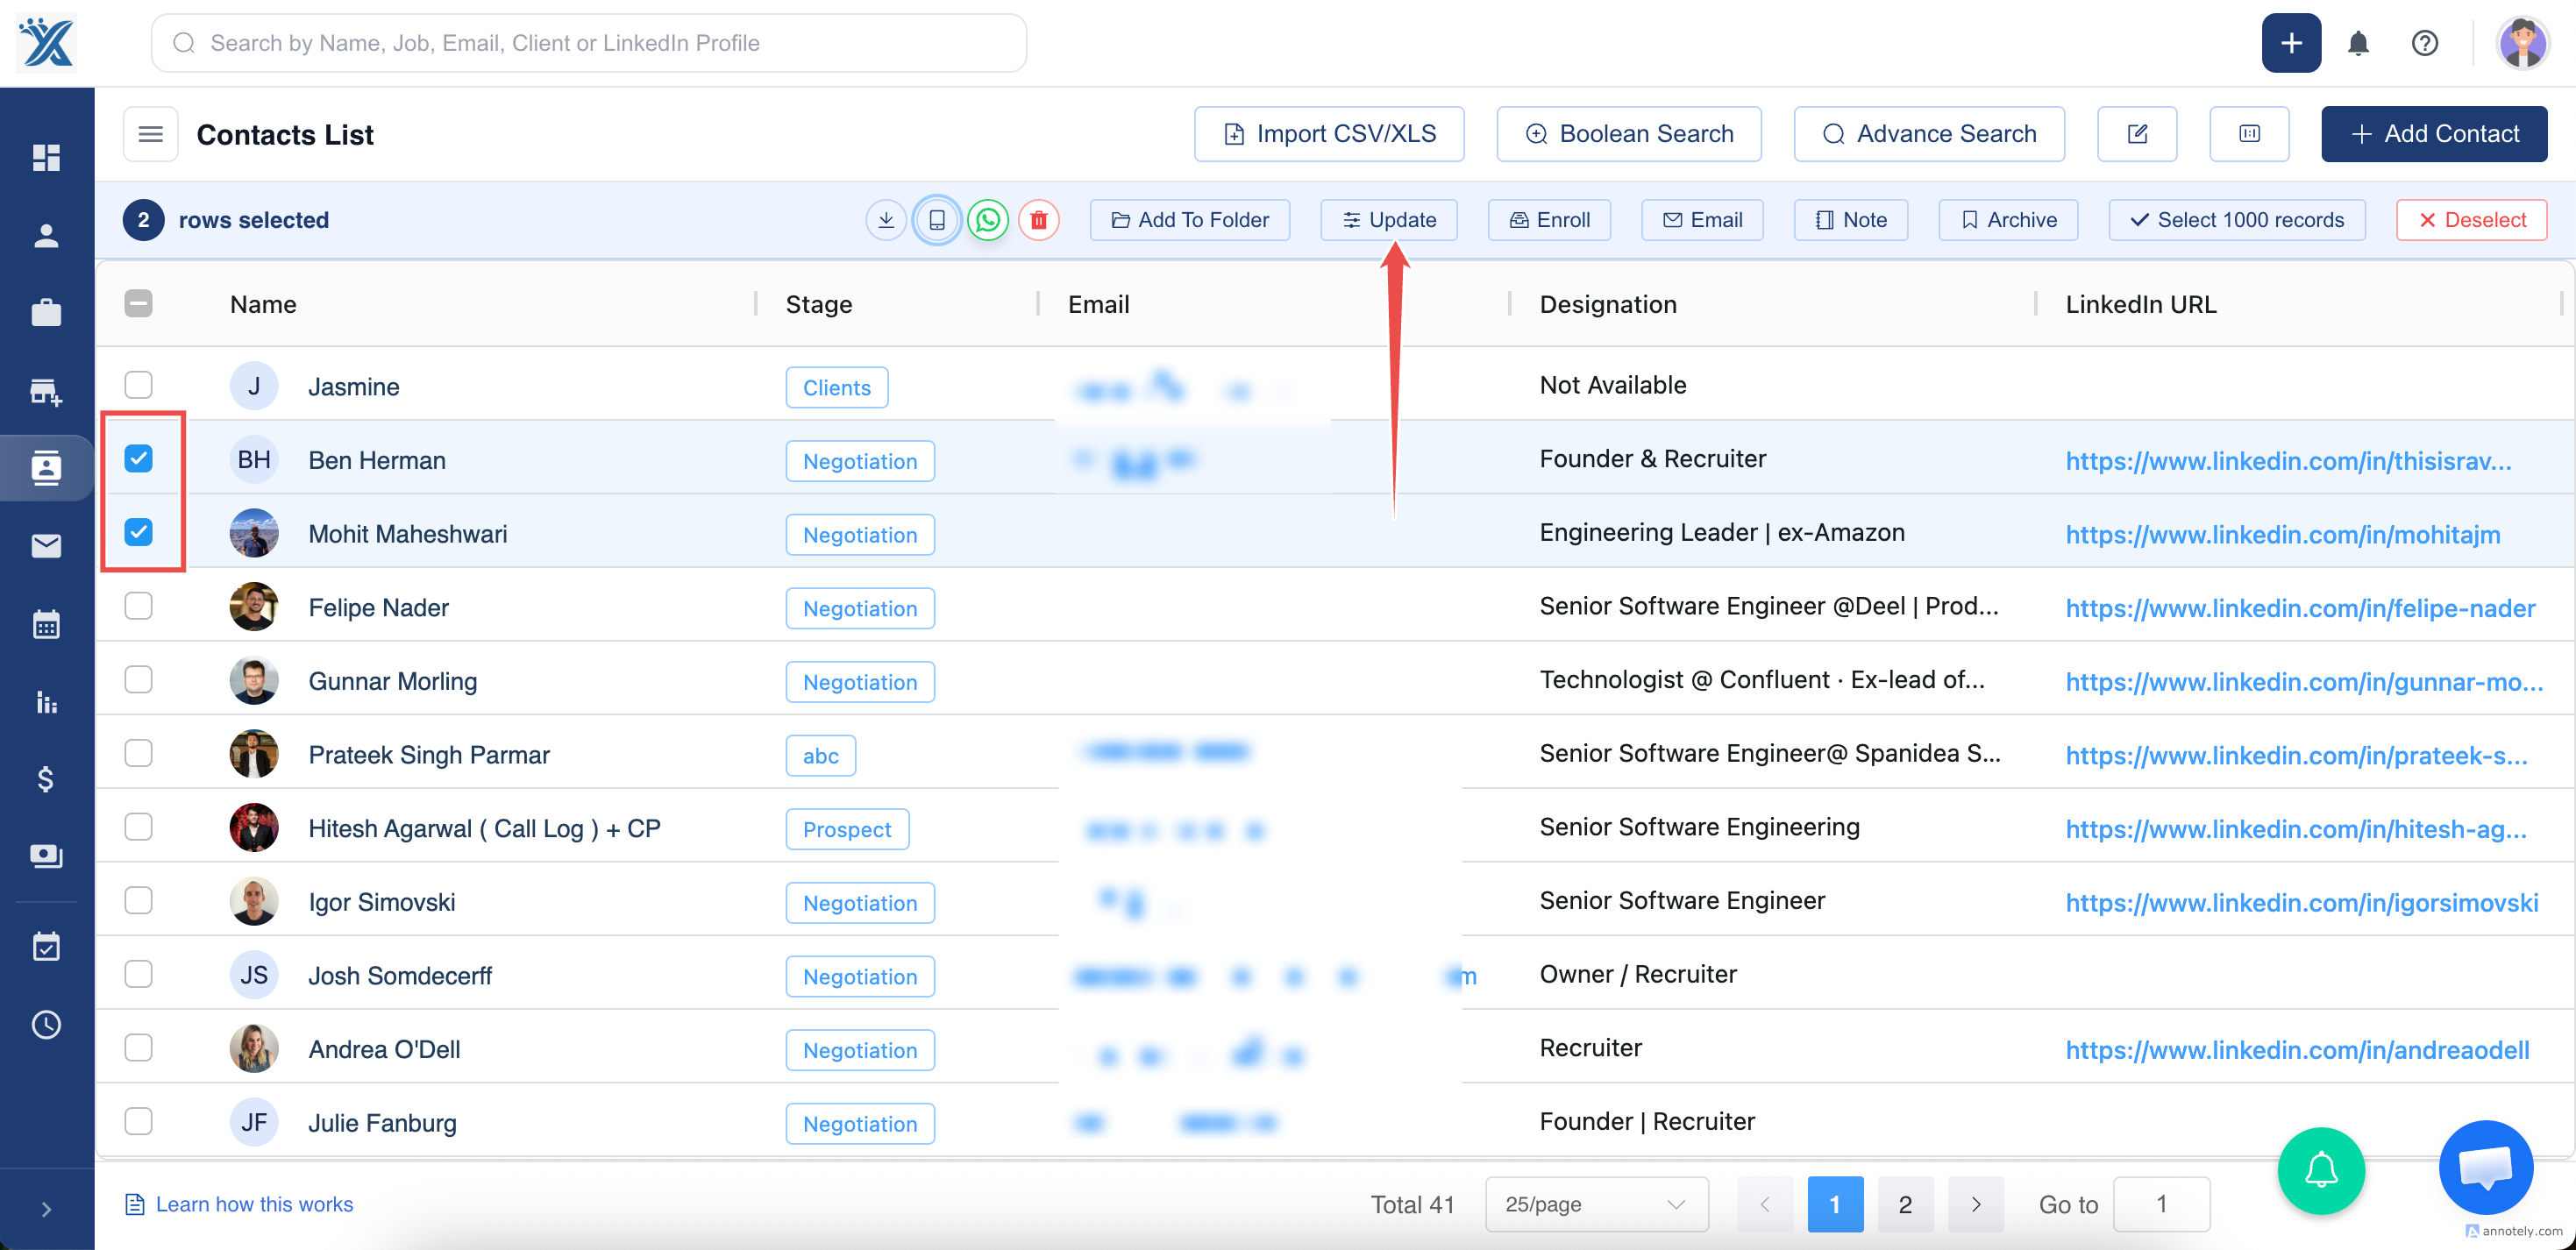
Step 4: Locate the “Stage” field
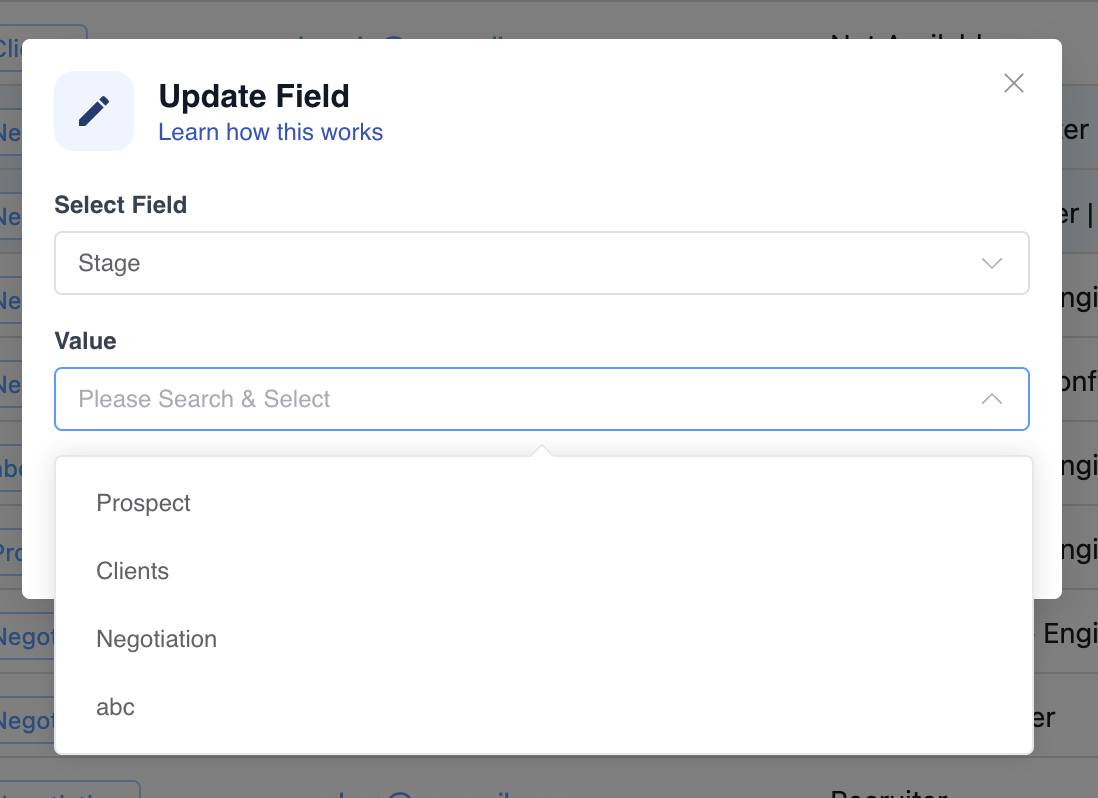
Step 5: Choose the desired stage.
Step 6: Click “Update” to apply the changes.
The selected contacts will now be updated to the chosen stage.
Method 2 : Update Contact Stage from the Contact Detail Page:
Step 1: Open the detail page for an individual contact from the contacts section
Step 2: Look for the “Contact Stage” section.
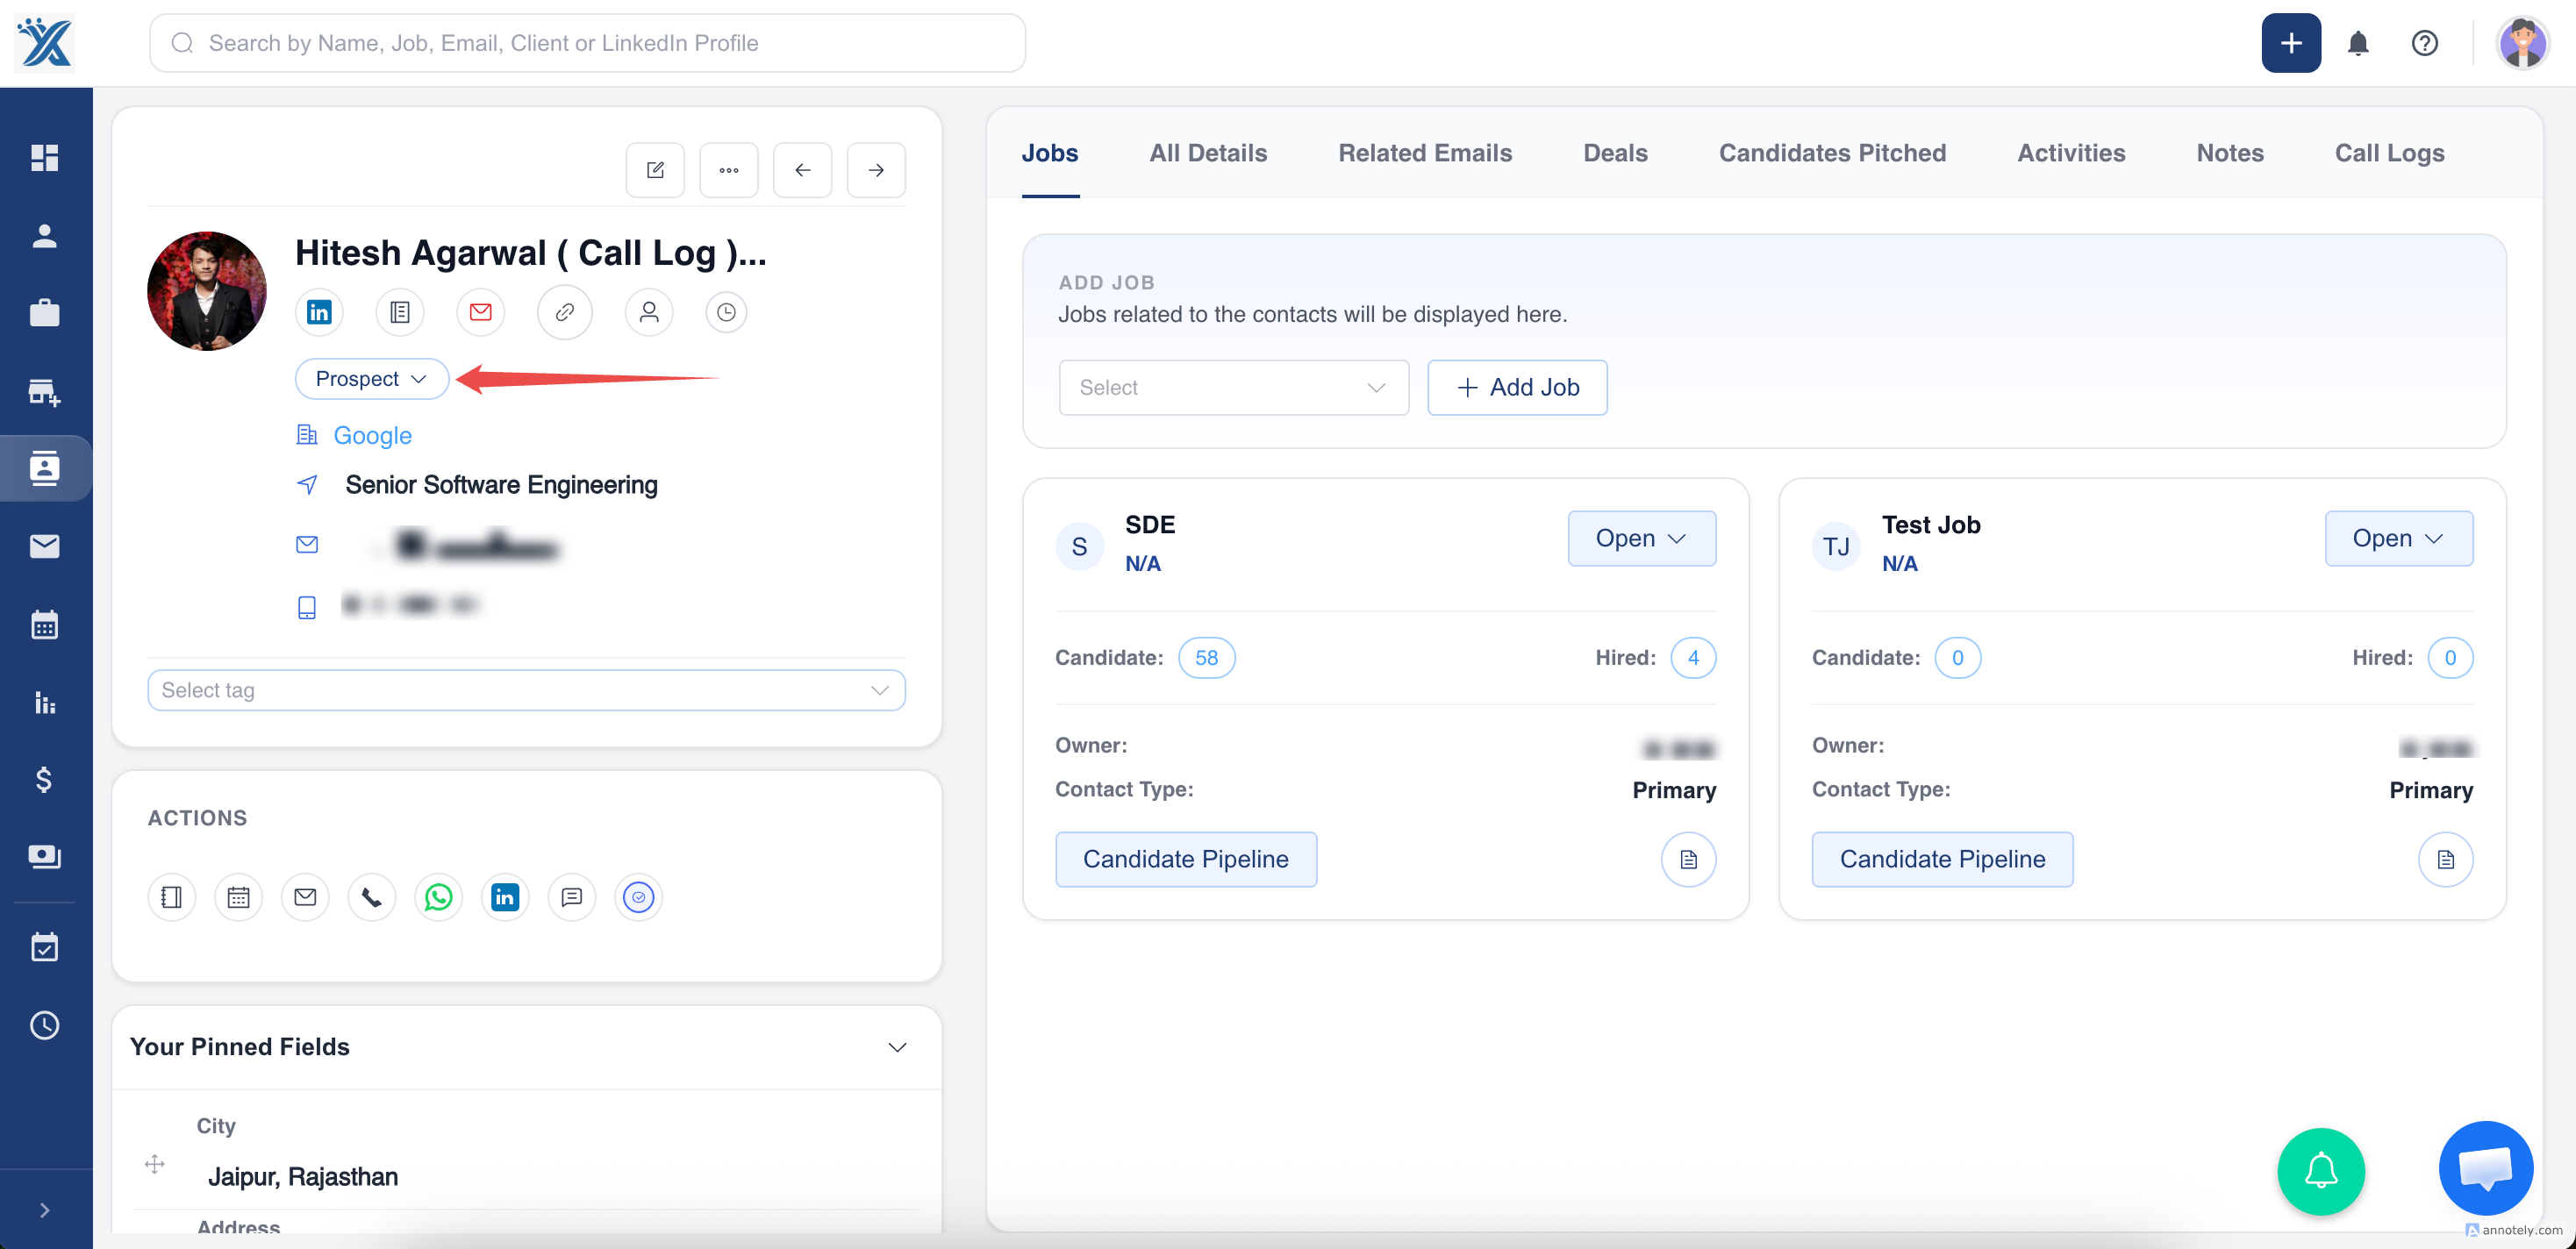
Step 3: Choose the new stage from the dropdown or list of available stages.
Step 4: Click on confirm
Customizing Contact Stages
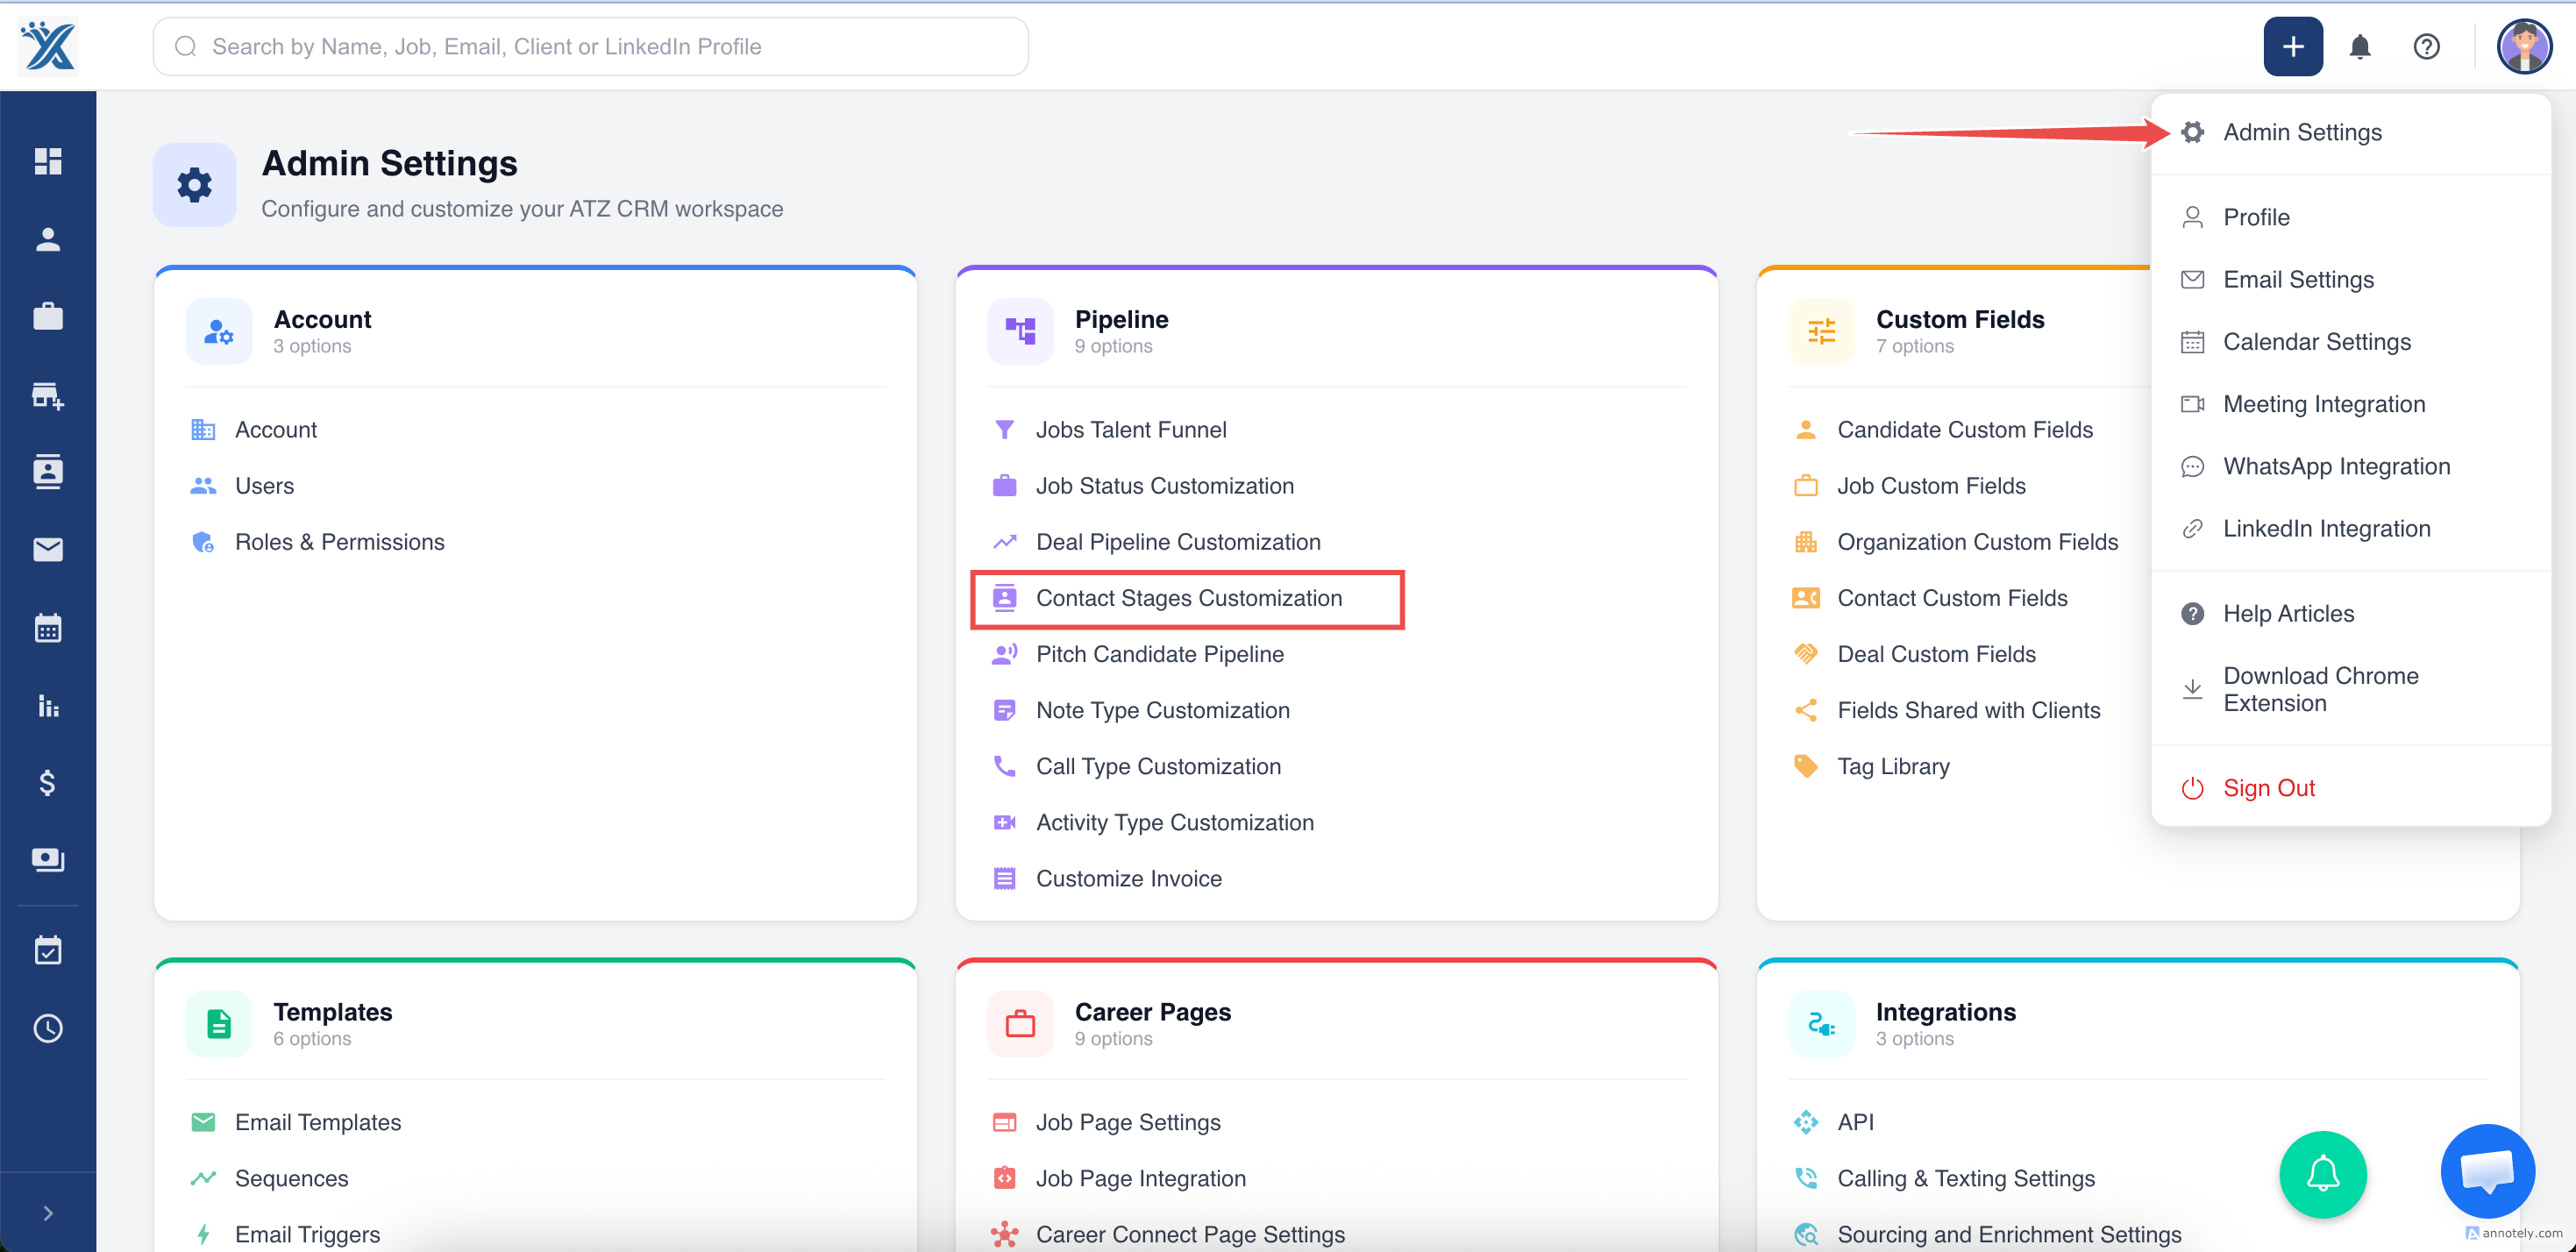
Step 1: Navigate to your ATZ CRM settings.
Step 2: Click on “Contact Stages Customization” .
Adding a New Contact Stage:
Step 3: In the settings, click “Add New Stage” or a similar button.

Step 4 : Enter the name of the new stage
Step 5: Save your changes.
Editing or Removing Existing Contact Stages:
- To edit, select the contact stage you want to modify.
- Make your changes and save them.
- To remove a stage, locate the delete option and confirm your action.
By effectively using and customizing contact stages in ATZ CRM, you can streamline your contact management and improve your workflow.
Was this article helpful?
That’s Great!
Thank you for your feedback
Sorry! We couldn't be helpful
Thank you for your feedback
Feedback sent
We appreciate your effort and will try to fix the article