Managing user access and permissions is a key aspect of efficiently running your ATZ CRM. This feature helps you customize user controls, ensure data security, and maintain organized workflows within the platform. In this blog, we’ll guide you through setting up Roles and Permissions, explaining how to create and manage custom roles, assign specific access levels, and optimize user controls.
Where to Find Roles and Permissions in ATZ CRM
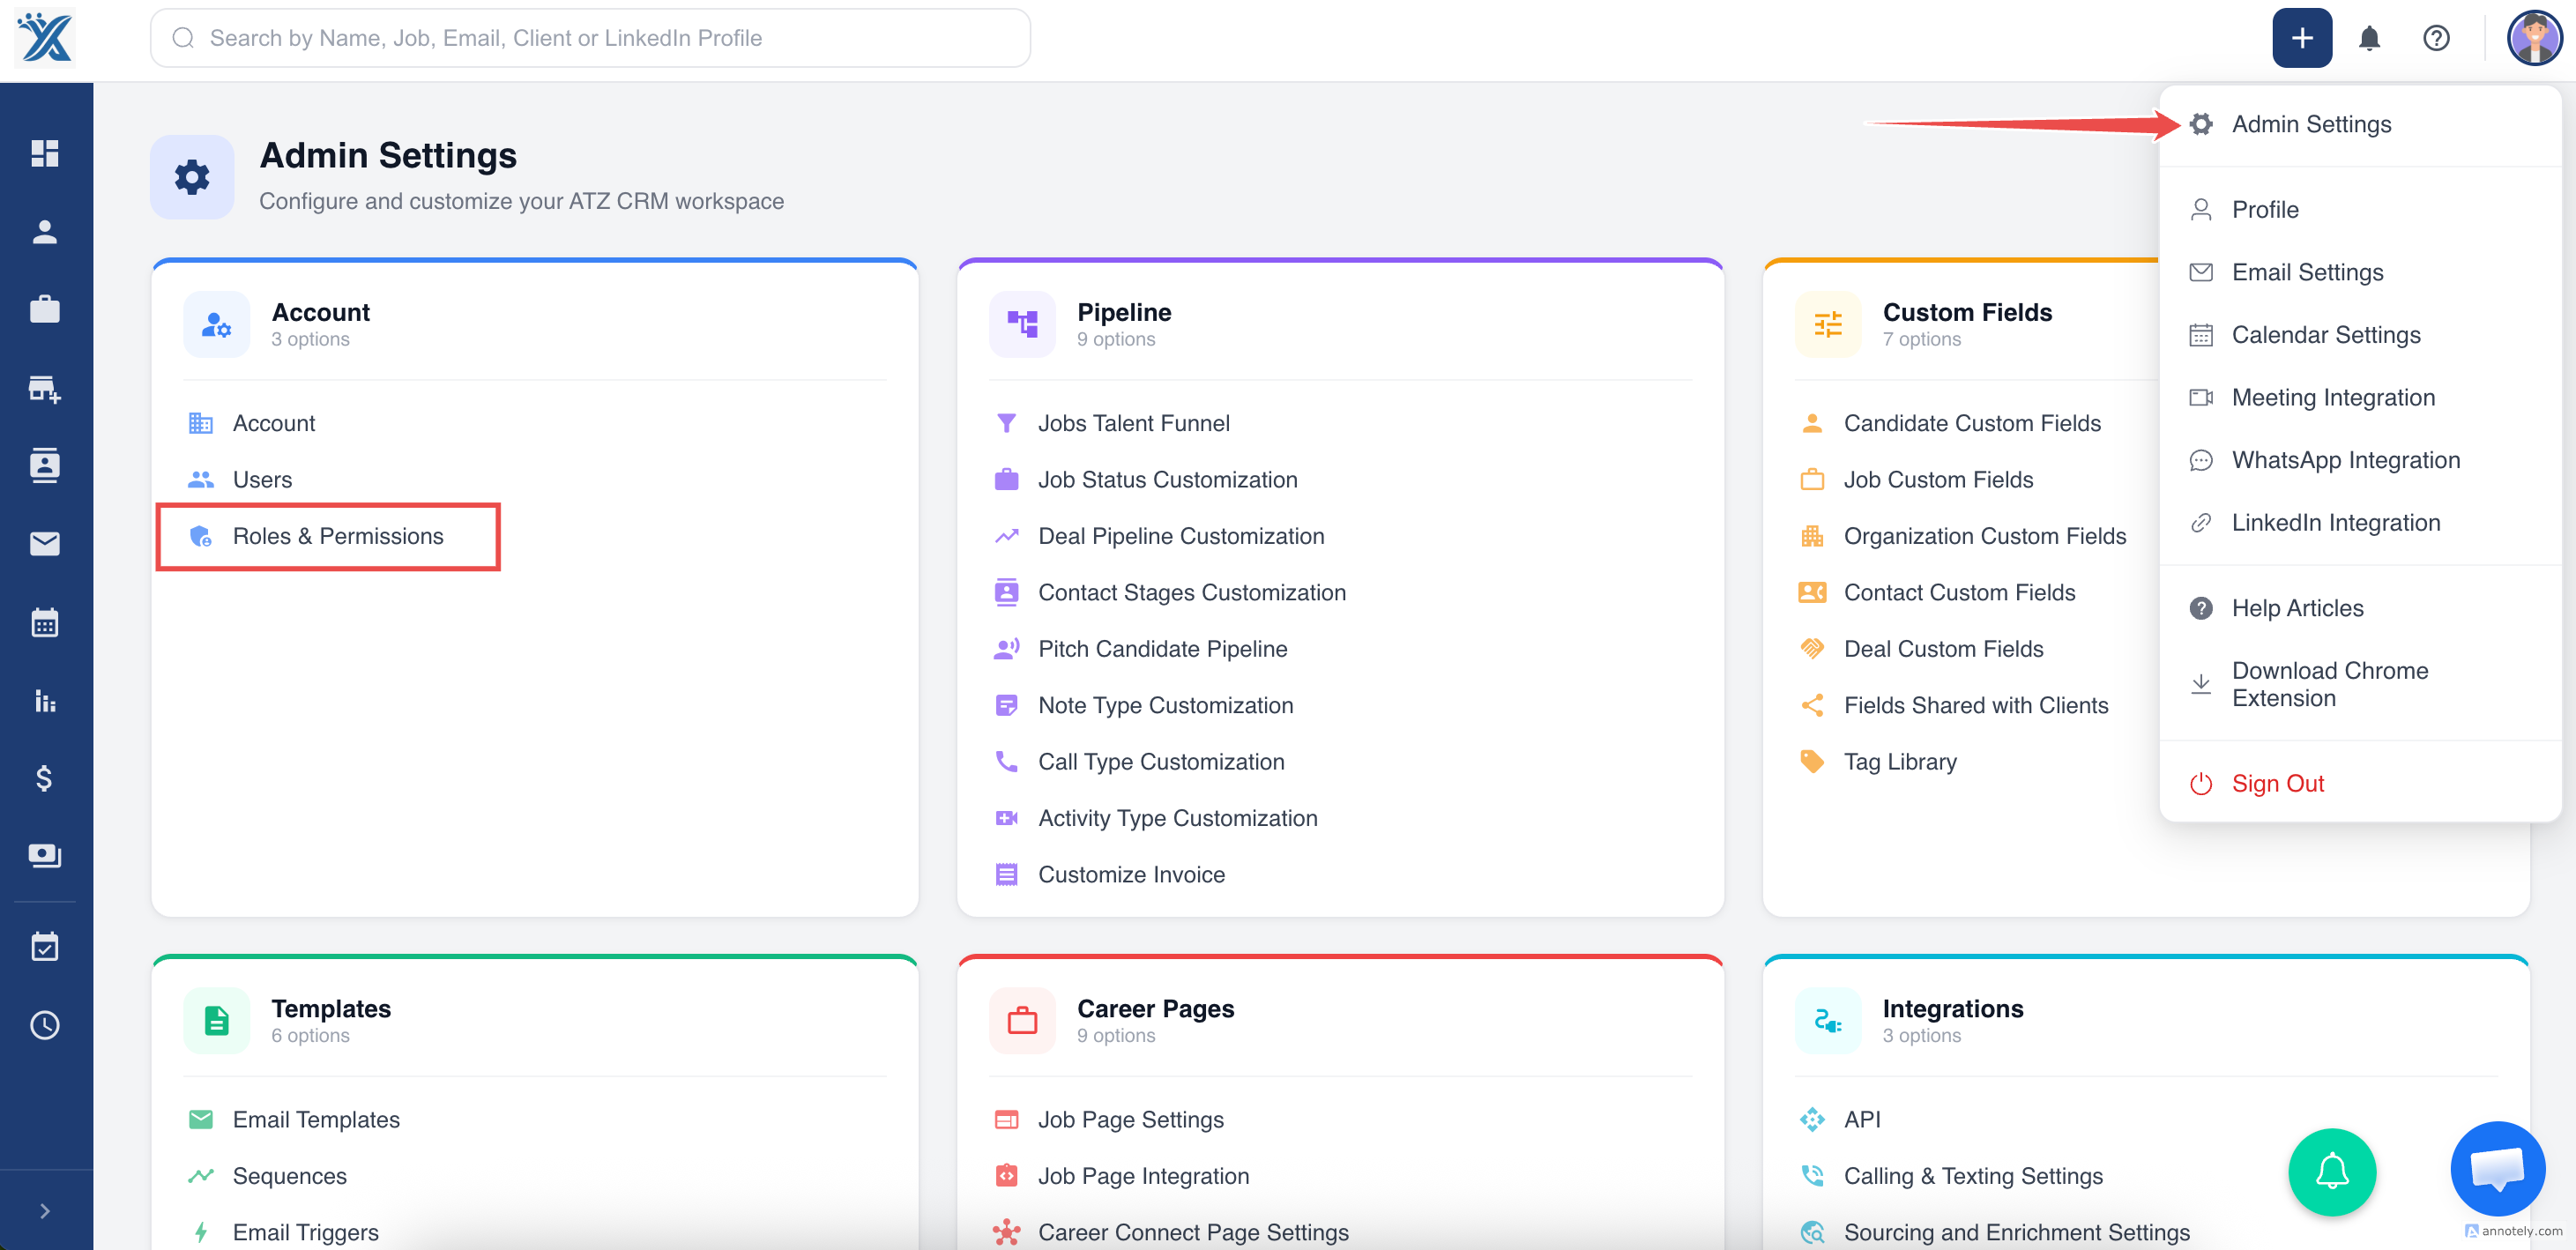
Navigate to Admin Settings
Log in to ATZ CRM and head to the Admin Settings section.
Access the "Accounts and Users" List
Scroll down and locate the Accounts and Users section. This is where you'll find all user-related management options.Select Roles and Permissions
Within this section, choose Roles and Permissions to configure user roles and define their permissions.
Creating a New Role in ATZ CRM
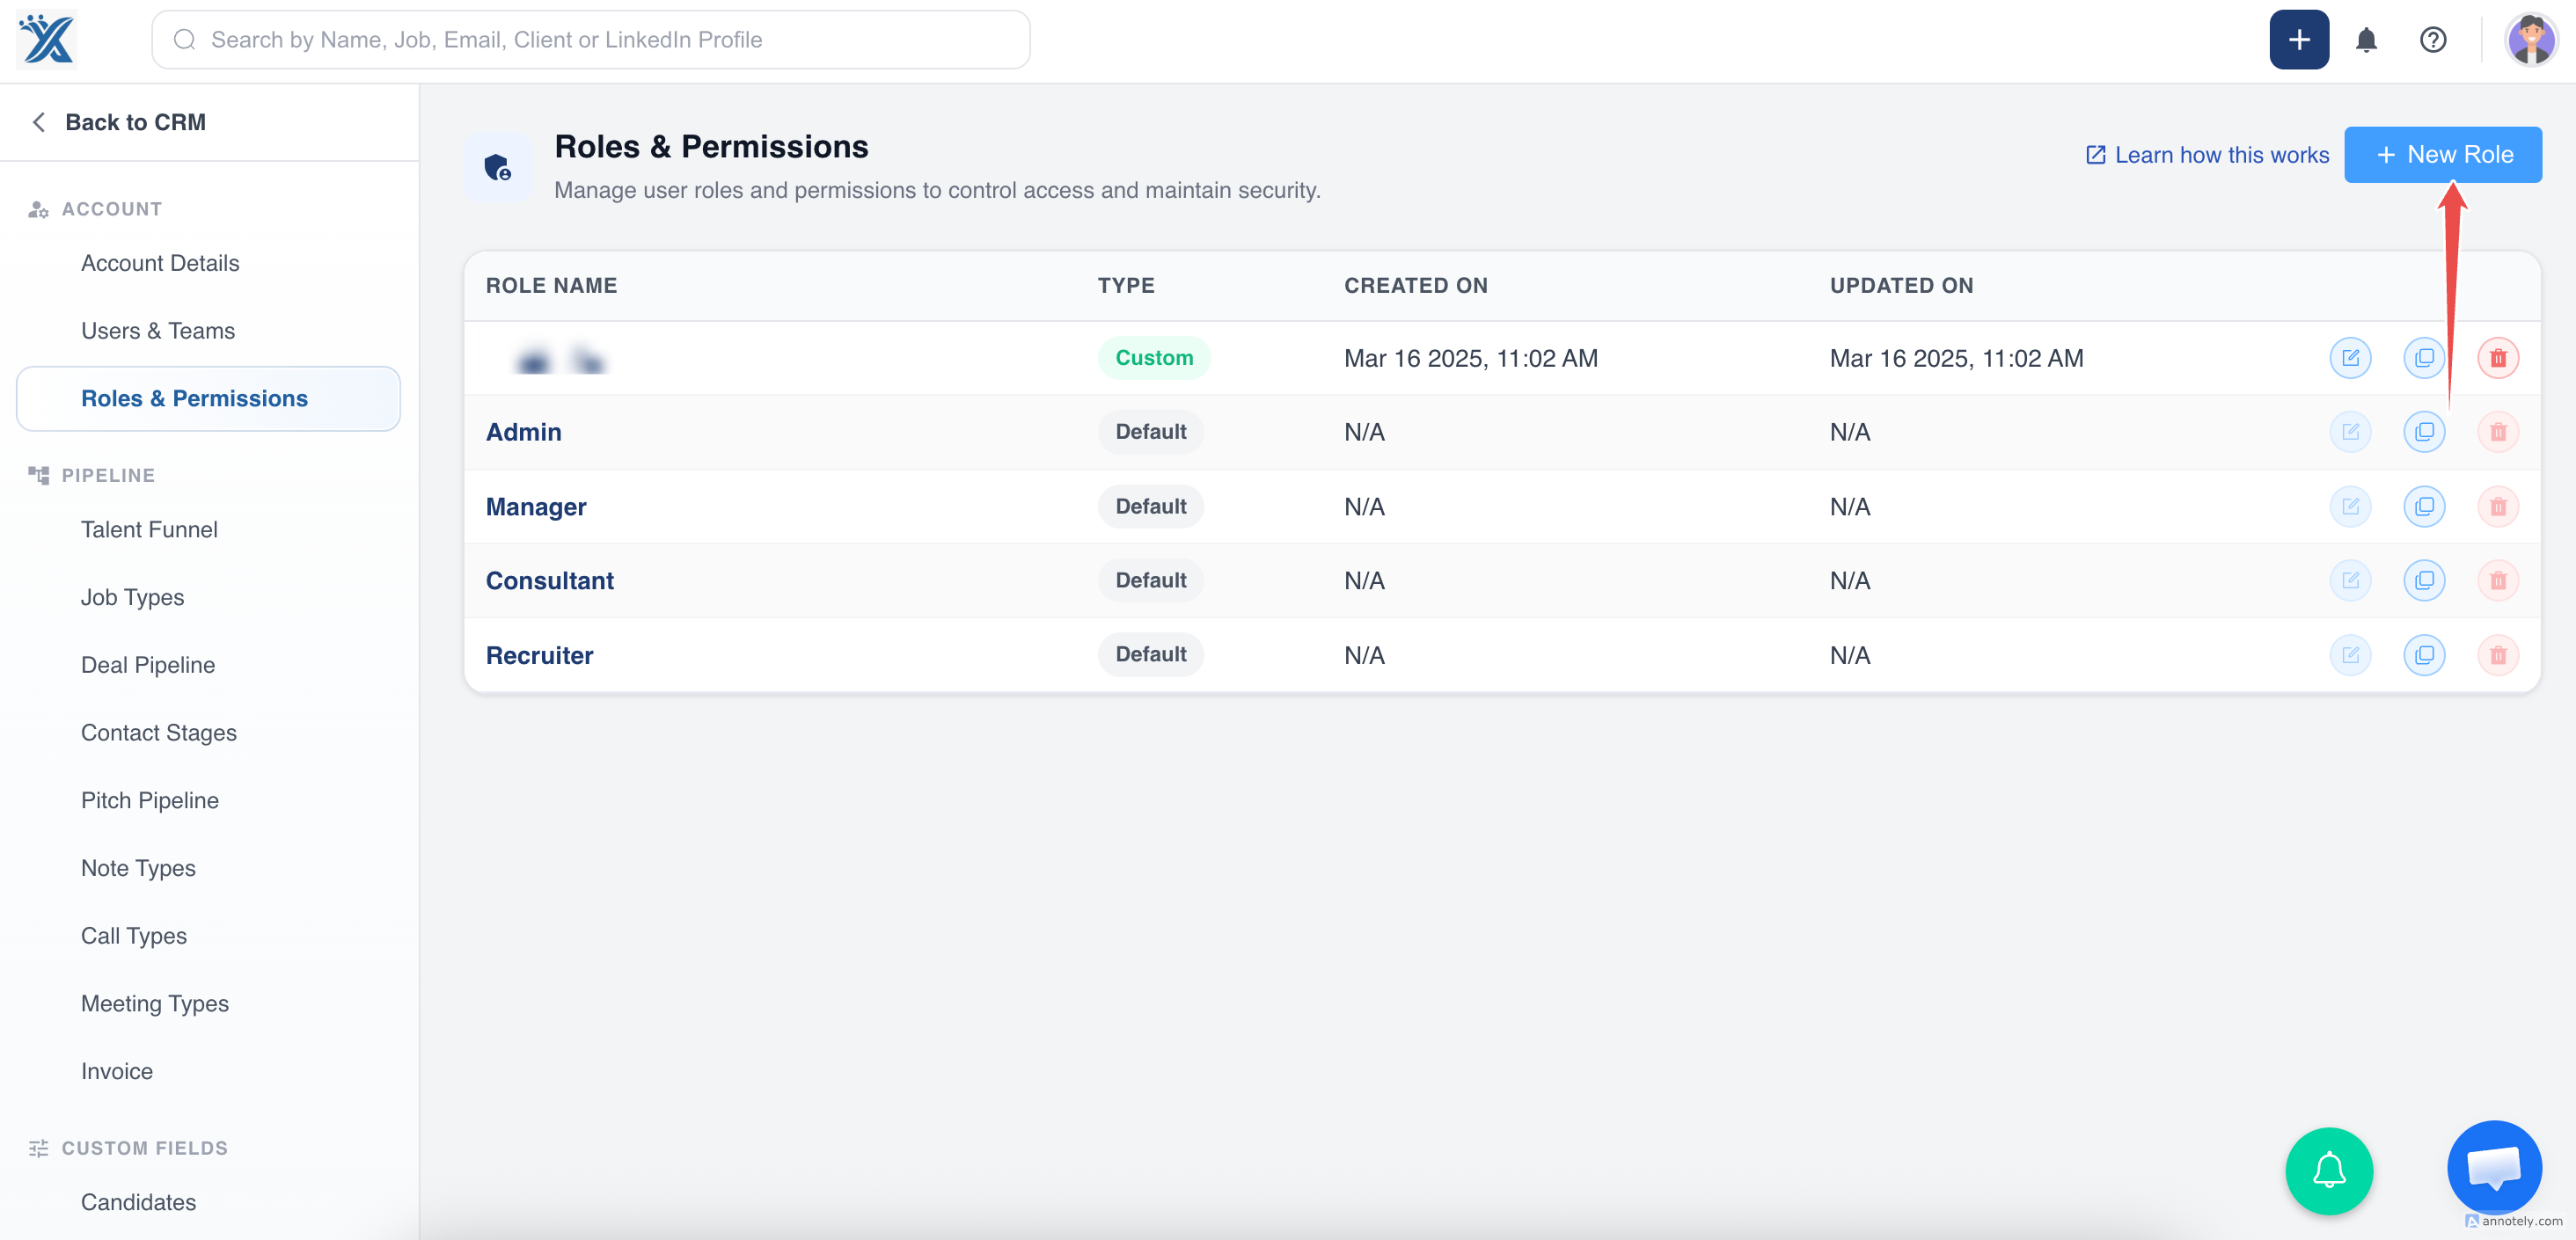
Click on ‘New Role’
In the Roles and Permissions section, click the New Role button to begin creating a custom role.
Enter the Role Name
Provide a name for the role under the Role Name field — for instance, Custom Role.Set Role Permissions
You can define permissions for the role in the following areas: view, edit, delete, create, change ownership, and file access. Each action has three possible access levels:Everything – Full access to the feature
Owned – Access only to records created or assigned to the user
None – No access to the feature

Choose the appropriate access level based on the responsibilities of the role.
Report & Admin Settings in ATZ CRM
Report Access: Control whether users can access reports, and specify the types of reports they can view.
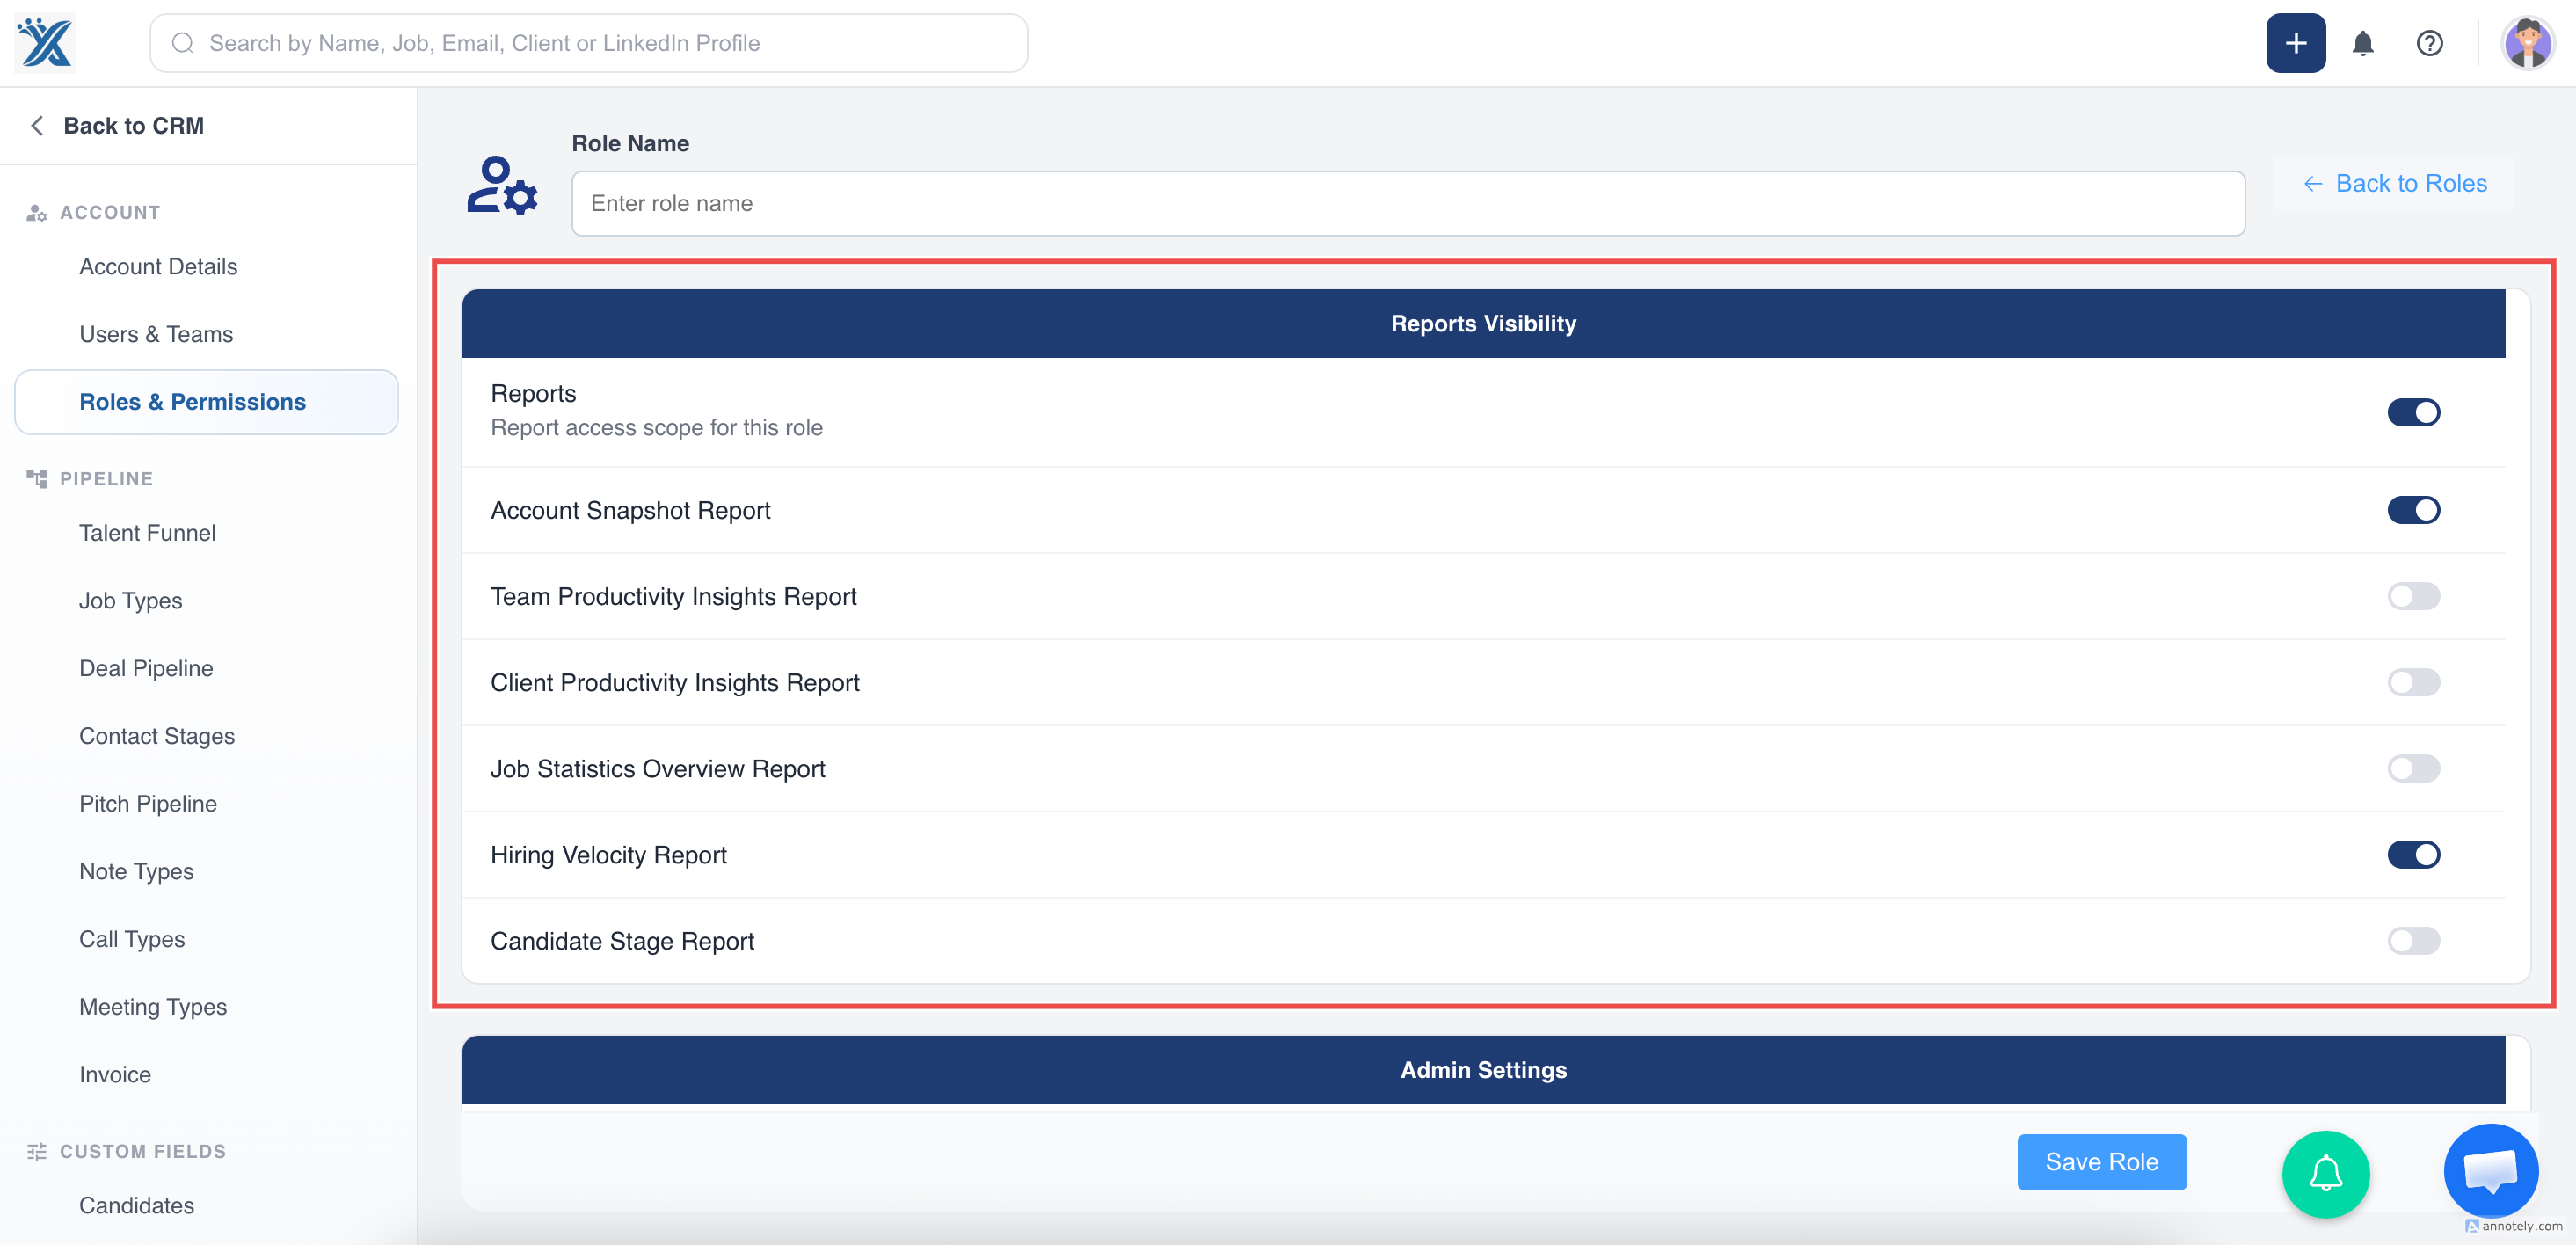
Admin Settings Access: Decide if the role should have access to modify administrative settings.

Bulk Actions
Customize what bulk operations the role can perform:
❌ No access to export data
❌ No permission for bulk delete
✅ Allow bulk update access

After configuring the role permissions, click Save to finalize the custom role.
Assigning Roles to Users in ATZ CRM
Navigate to the Users section under the Accounts and Users list.
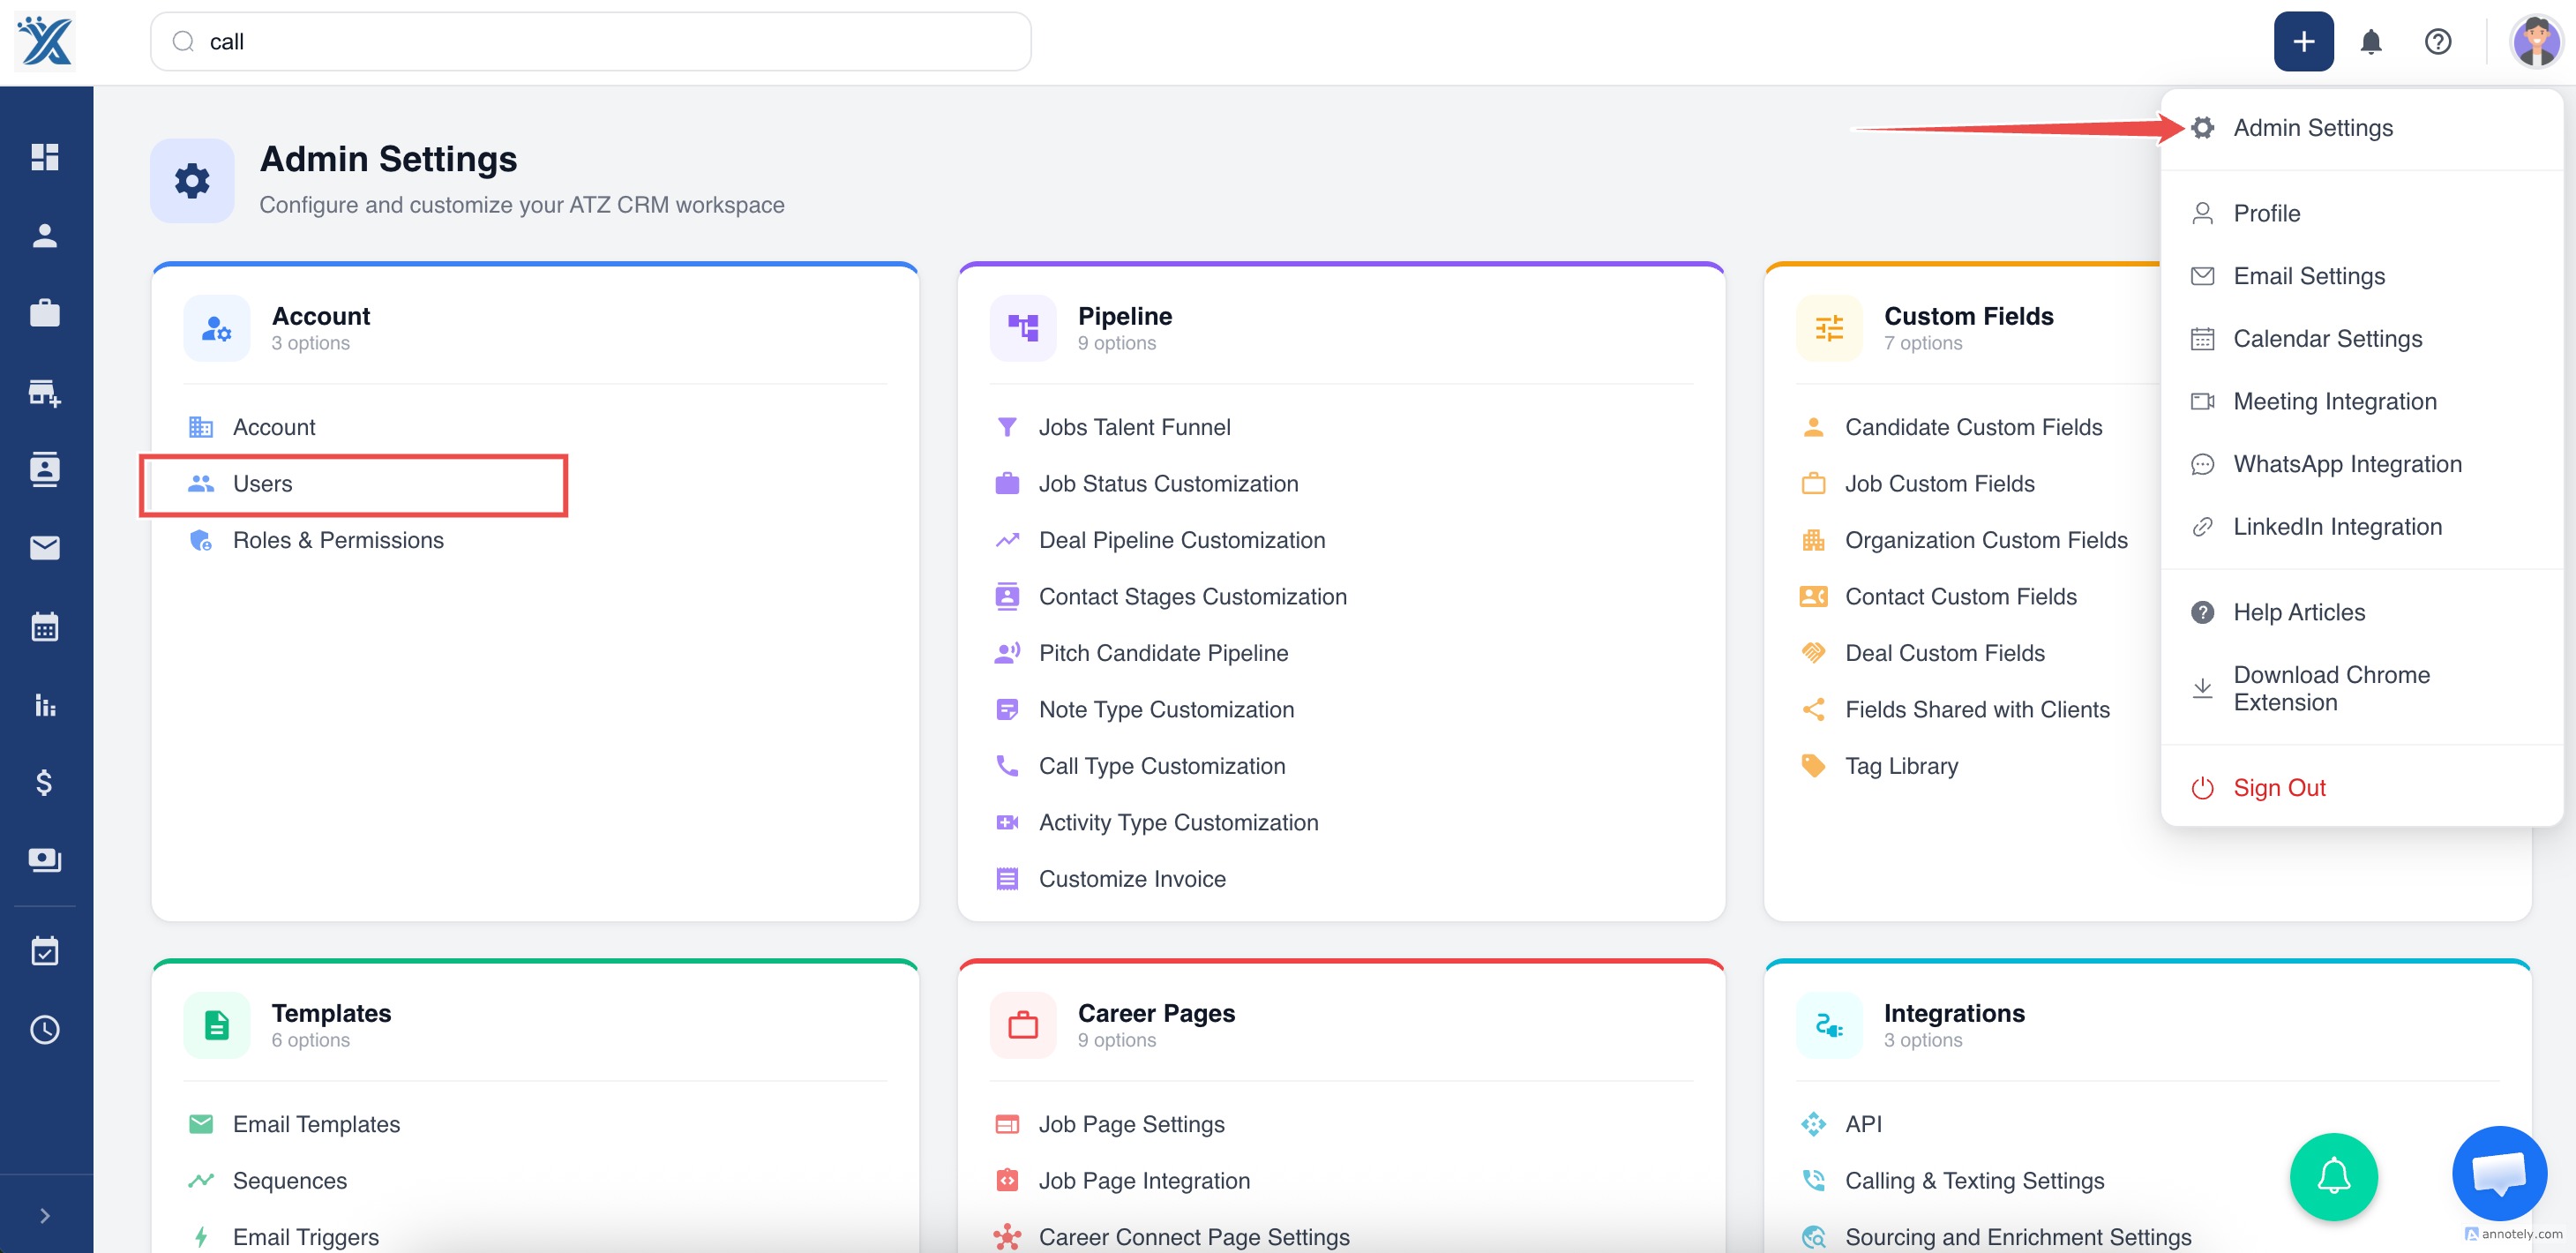
View the list of all users in your CRM.
Select a user and assign them a role by choosing from the available options.
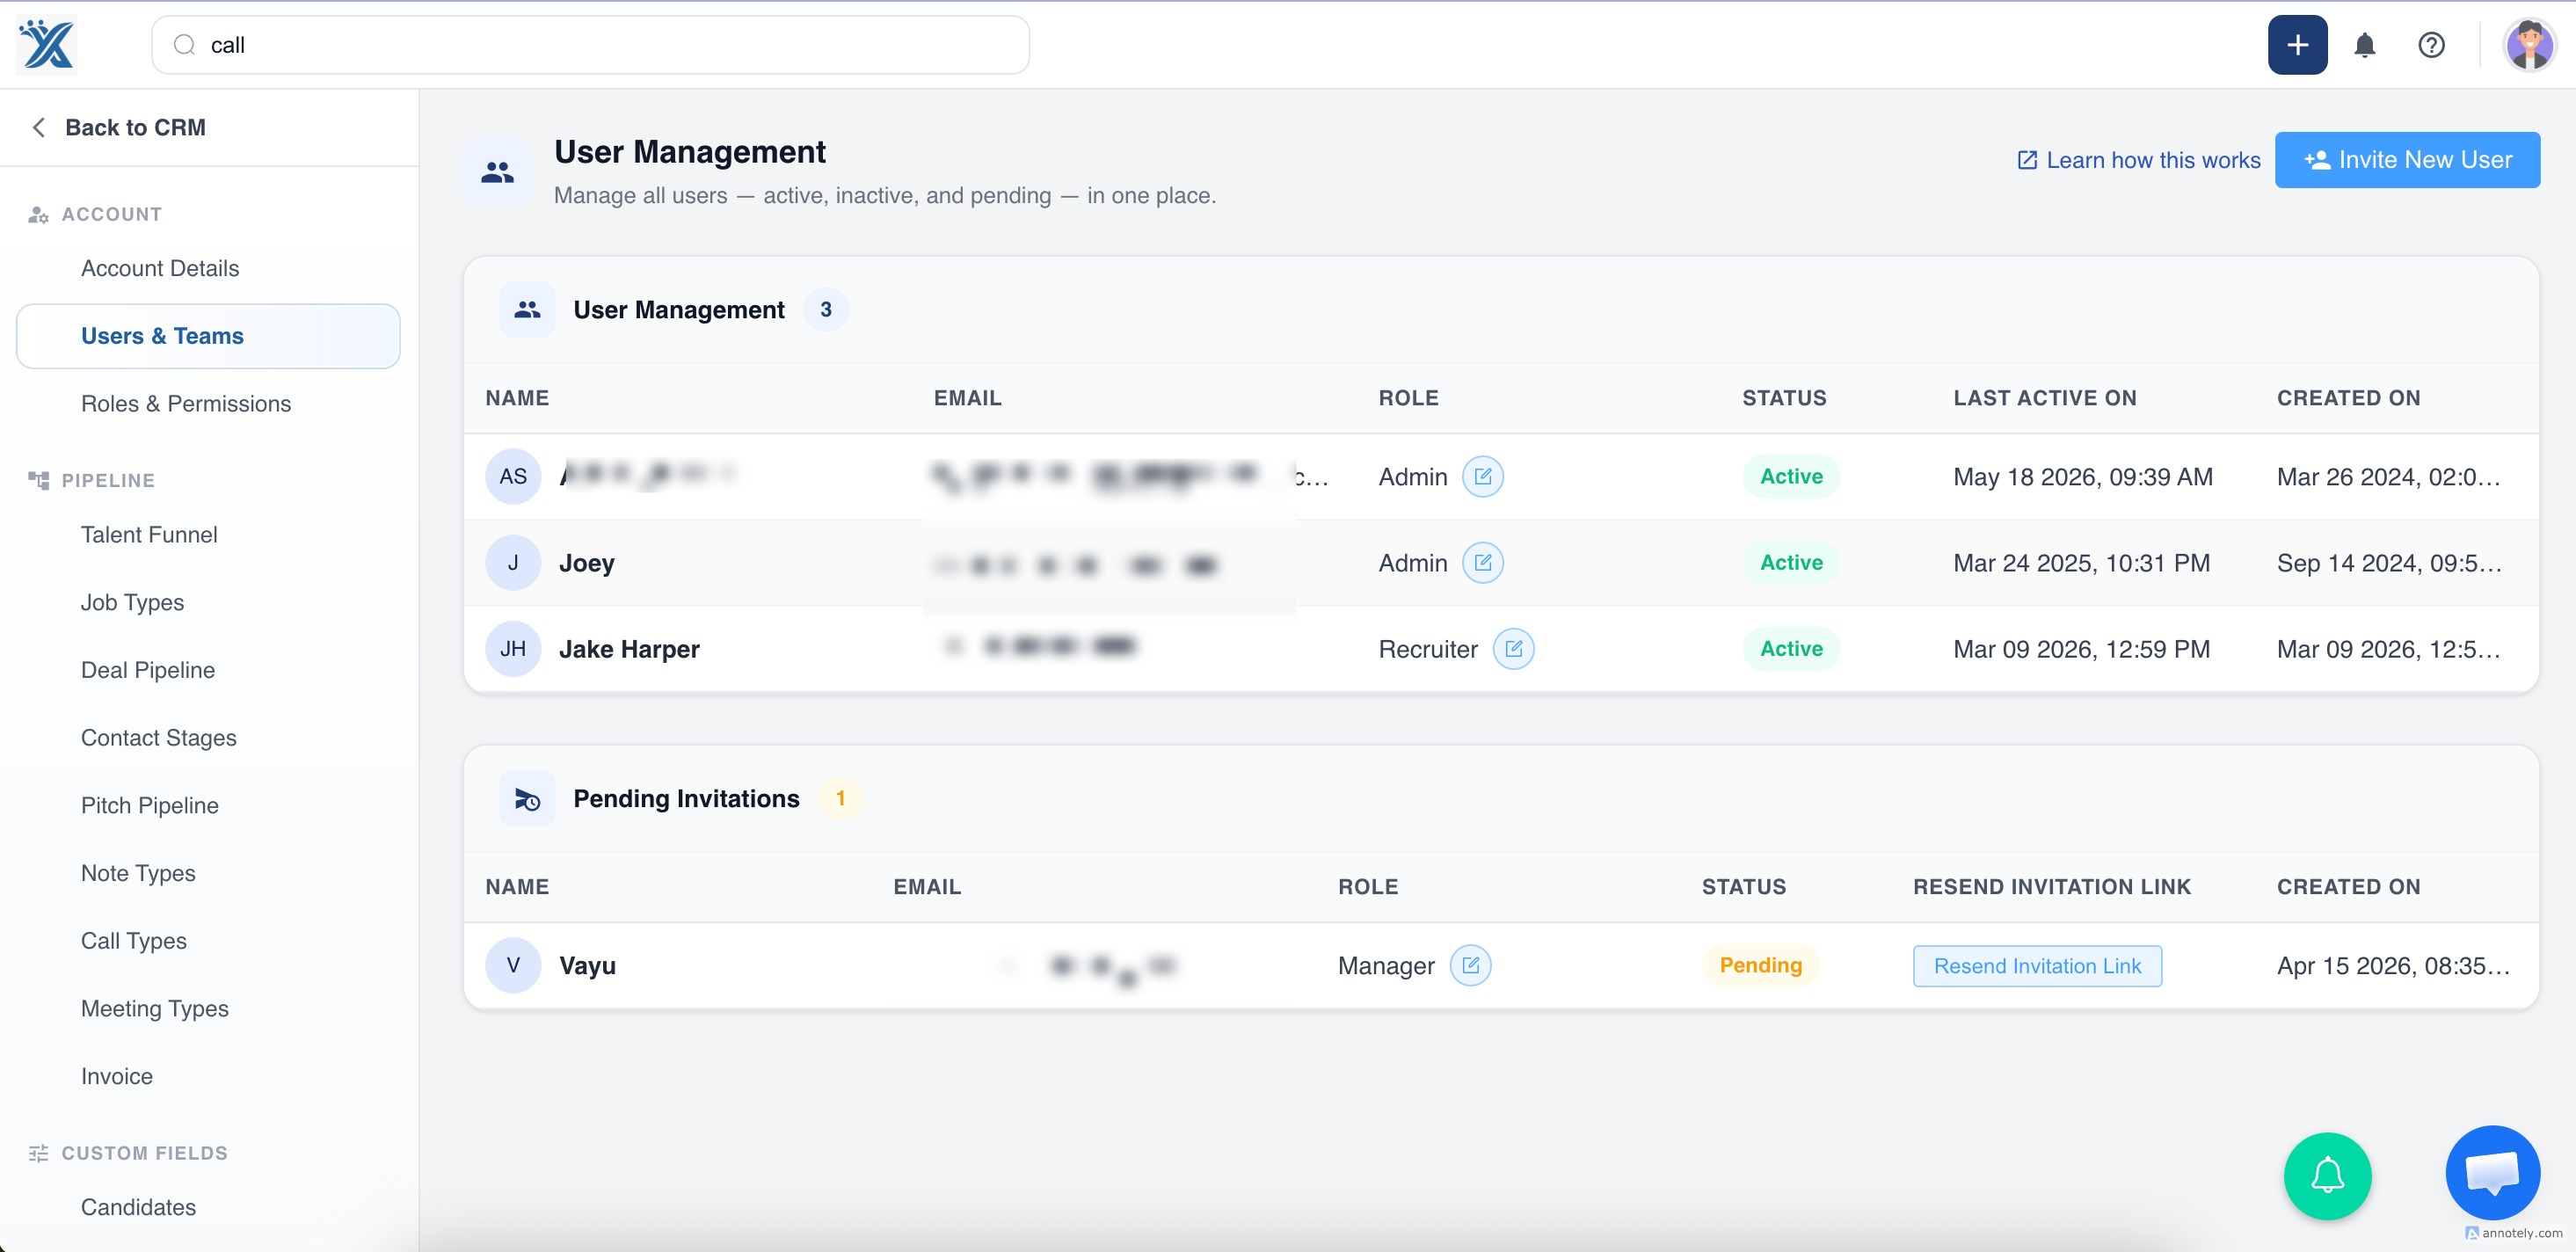
Custom roles you’ve created will appear alongside ATZ CRM’s default roles like Manager, Consultant, and Recruiter. These default roles cannot be edited or deleted, but their permissions are visible for reference.
Understanding Role Impact
Once a user is assigned a custom role:
Their access will be limited according to the permissions you’ve set. For example, a user with only "view" access won’t be able to create, edit, or delete records.
As an admin, you can switch between user views to observe the role’s impact on user capabilities.
If you need further guidance feel free to reach out to our chat support — we’re here to assist you
Was this article helpful?
That’s Great!
Thank you for your feedback
Sorry! We couldn't be helpful
Thank you for your feedback
Feedback sent
We appreciate your effort and will try to fix the article